UITabBarController with UINavigationController Using Interface Builder
I’ve seen a good bit of sample code that shows how to implement using a UINavigationController in a view controller that is managed by a UITabBarController, but I haven’t seen much on how to do it with Interface Builder. Turns out that it’s pretty simple and I’m going to show you how.
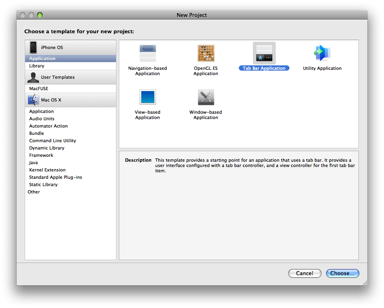
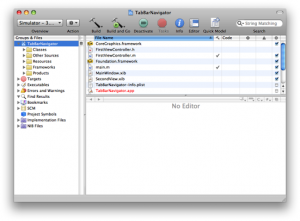
To get started, create a new project in Xcode. Select the Tab Bar Application template and click Choose….
Name the project, TabBarNavigator and click Save
Change The Controller Type
-
In Xcode, expand the Resources group in the Groups and Files view and double-click MainWindow.xib to open the xib in Interface Builder
-
When Interface builder opens, change the xib View Mode to the tree view mode and expand your Tab Bar Controller item.
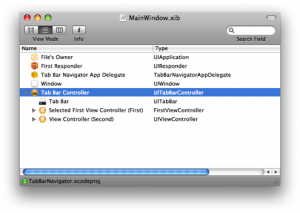
-
Make sure that the Tab View Controller object is selected. In the object inspector switch to the Attributes tab and change the Class for the First controller from View Controller to Navigation Controller.
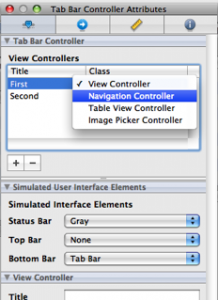
-
You will notice back in the MainWindow.xib window that the view controller for First View is now a UINavigationController. Expand the UINavigationController item now.
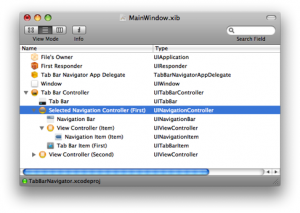
-
Now select the View Controller that is a child of our new UINavigationController. Click on the Identity tab of the object inspector and change the Class to FirstViewController.

-
Click on the Navigation Item that is a child of the First View Controller and change the Title in the Attributes tab of the object inspector to “First”.
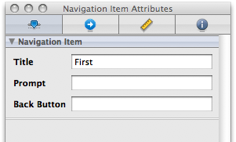
-
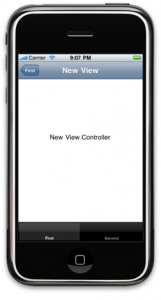
Save your changes in Interface Builder, switch back to Xcode and Build & Go. You should see something like the following in your First view tab.
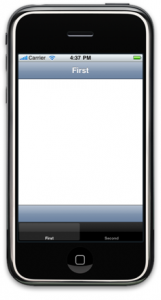
-
Notice that there is a Toolbar visible at the bottom of the first view. If you would like to hide this, go back into Interface Builder and select the Navigation Controller In the object inspector, uncheck the Shows Toolbar checkbox.
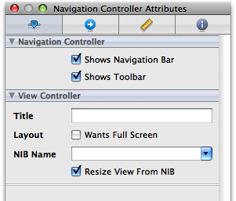
Pushing a New Controller
Before we create a new view controller, let’s set up our FirstViewController to create an event that will trigger pushing the new controller. Since our FirstView was not created with a xib, let’s create one and then add actions and outlets to it.
-
In Xcode, right-click or ctrl-click the Resources group and select Add | New File…. In the ensuing dialog, select View XIB in the User Interface section of iPhone OS templates and click Next. Name the XIB FirstView and click Finish.
-
Double-click the new XIB to open it in Interface Builder and select the Identity tab after you have made sure that File’s Owner is selected. Change the Class field to FirstViewController.
-
Ctrl-click and drag a connection from the File’s Owner object to the View object in the main window for our XIB and select view in the ensuing pop up menu.
-
From the Object Library drag and drop a button onto the view. Double-click the button and give it the title “Push”. Save your changes in Interface Builder and switch back to Xcode.
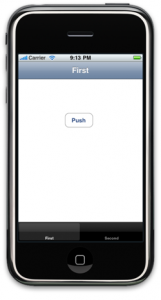
-
Open the file FirstViewController.h and add an action so that the header looks like this:
#import
@interface FirstViewController : UIViewController { } - (IBAction)push:(id)sender; @end -
Open the file FirstViewController.m and implement the action so that the code looks like this:
#import "FirstViewController.h"

@implementation FirstViewController

- (IBAction)push:(id)sender
{

}

- (void)dealloc {
    [super dealloc];
}

@end
Note: You can safely delete all of the view controller template code which I have done in this example. Don’t worry. You won’t hurt anything.
We will come back to the push implementation after we have created our new view controller that we are going to push.
Create the New View Controller
We are now going to create the new view controller that will be displayed when we tap our “Push” button in the FirstViewController.
-
In Xcode, right-click or ctrl-click the Classes group and select Add | New File…. In the ensuing dialog, select UIViewController subclass in the Cocoa Touch Class category of the iPhone OS templates. Make sure With XIB for user interface is checked and click Next. Name the file NewViewController.m and click Finish.
-
For organization purposes, move the newly created NewViewController.xib file into the Resources group. Then double-click it to open it in Interface Builder.
-
In Interface Builder, drag a UILabel onto the view and give it the title “New View Controller”. Save the file and switch back to Xcode.
-
Open the file FirstViewController.m again and implement controller push code so that it looks like this:
#import "FirstViewController.h"
#import "NewViewController.h"

@implementation FirstViewController

- (IBAction)push:(id)sender
{
  NewViewController *controller = [[NewViewController alloc] initWithNibName:@"NewViewController" bundle:nil];
  [[self navigationController] pushViewController:controller animated:YES];
  [controller release], controller = nil;
}

- (void)dealloc {
    [super dealloc];
}

@end
Don’t forget to #import “NewViewController.h”
-
To connect our button to the push action, double-click the FirstView.xib file in the Resources group to open it in Interface Builder.
-
Ctrl-click and drag a connection from the “Push” button in our view to the File’s Owner object and select push: in the ensuing pop up menu. Save your changes in Interface Builder. Switch back to Xcode and Build & Go.
-
Additionally, you can give your New View Controller a title by implementing -viewDidLoad. Just open your NewViewController.m file and uncomment the -viewDidLoad code making it look like the following:
#import "NewViewController.h"

@implementation NewViewController

- (void)viewDidLoad {
  [self setTitle:@"New View"];
  [super viewDidLoad];
}

- (void)dealloc {
  [super dealloc];
}

@end
And that’s pretty much all there is to it. There are a lot of steps here, but I think you’ll see that setting up your application to implement both a UITabBarController and a UINavigationController is pretty straight forward.
Conclusion
How best to organize your views in an iPhone application is a design process. Often applications will have a lot of data for your users to access and it will be up to you to find the best way to organize it. Being able to utilize both a tab bar and a navigation controller can really help in this process. Until next time.

[…] tutorials on creating a UITabBarController directly through code (a more complex implementation) or from the main XIB. However, I want to separate out the UITabBarController UI elements into a separate XIB and load […]
Although I believe it is really beneficial to understand what’s working under the hood, this is a great stepping stone for someone to see the implementation method using Interface Builder.
One of the most confusing aspects of learning Cocoa (for me) has been the learning curve associated with Interface Builder rather than with Objective-C. This bridged some of that.
I’ll forever use list mode when viewing objects in IB. Thanks for that great tip!
Thanks!
It’s like your post was tailored to my question. It told me precisely everything I needed to know (and more, that I was wondering about but had put off “for later”). Many many thanks.
Great tutorial. I’ve read many on this topic, and watched a couple videos. This was by far the easiest and worked the first time I tried it. Thanks!
Heey dude,
verry nice tut. but there is something going wrong here.
I made this in IB.. but when i wanna load the view of my firstviewcontroller.. (becouse i already had a layout) i get a manner warning? you know how i can solf this?
TX Bram
Bram_Dimmick@hotmail.com
Oh im sorry i solved it… but now i have another problem.. when i enter some text in my text fields and i press enter.. the keyboard wont disappear.. why is that?
@B-ram. You have to implement the keyboard delegate callbacks to be able to dismiss the keyboard on tapping enter. There are several good tutorials that a google search should turn up. The bottom line is you watch for the delegate callback and if the key was enter, you call -resignFirstResponder on the textfield that has focus.
@Matt Long
Thanks matt i solved it!
hahah omg. sorry im new with SDK..
i can’t find the received action in my files owner for the push button..
I have the same like the tutorial.
But called my button “Probeer Whizzie nu!”
is there somebody who knows what i did wrong or something?
TX
@B-ram Try this tutorial and see if it helps to clear some things up: http://www.cimgf.com/2008/10/01/cocoa-touch-tutorial-iphone-application-example/
-Matt
@Matt Long Tx! but i know how to link actions to objects.. i have a back button on my second view.. i linked that button to the received action. but my firstviewcontroller’s files owner don’t has a received action.. i don’t understand why …