Core Animation Tutorial: Wizard Dialog with Transitions
A question that I have seen pop up a few times is how to build a Wizard in Cocoa. Having thought about that question a bit I realized that a better answer to it is — how to build a wizard in Cocoa using Core Animation.
The basic concept behind this project is to present a window to the user that will walk them through a list of options. To accomplish this task, I created a number of NSViews that will be presented to the user in order so that they can make the decisions needed. To make this a little easier, I have extended NSView to create MSZLinkedView. The added functionality in this subclass is that the view has a reference to the previous and next views in the wizard. These references are set in interface builder directly so that I do not have to worry about them in code.
You can download the sample project from here: Core Animation Wizard Tutorial Project.
MSZLinkedView.h
@interface MSZLinkedView : NSView {
    __weak IBOutlet MSZLinkedView *previousView;
    __weak IBOutlet MSZLinkedView *nextView;

    __weak IBOutlet NSButton *nextButton;
    __weak IBOutlet NSButton *previousButton;
}

@property (retain) MSZLinkedView *previousView, *nextView;

@end
MSZLinkedView.m
@implementation MSZLinkedView

@synthesize  previousView, nextView;

- (void)awakeFromNib
{
    [self setWantsLayer:YES];
    [previousButton setEnabled:(previousView != nil)];
    [nextButton setEnabled:(nextView != nil)];
}

@end
There is not much to this class. The primary purpose is to keep a reference to its place in the linked list. But since I have the subclass I have added the core animation setWantsLayer: call into the awakeFromNib and it also checks to see if it has a previous and/or next view to disable the appropriate buttons. This NSView subclass will be used to build the different “pages” of the wizard.
Building the XIB/NIB
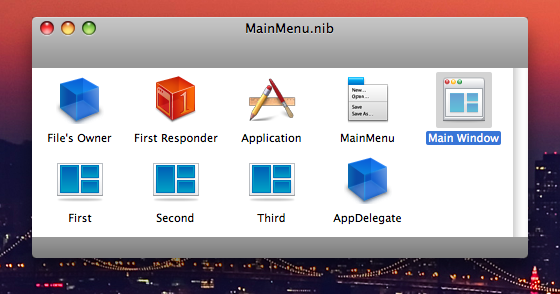 The next step in building the wizard is to lay out the views in Interface Builder. In the sample project, I have created three views: first, second and third. Each of these views has a next button, previous button and a custom box with a different color. If you build and run the project you can flip through these three and the appropriate button will be disabled.
Each view links to the next view, the previous view, and its own next and previous button. All of these links will occur before the awakeFromNib is called on each view so that the buttons will be disabled as appropriate. In an actual application I would have put in text fields, radio buttons, pictures, etc on each “slide” but in this case I only put in a simple box with a custom design. This will allow the user to see the slides clearly.
The application delegate in this example holds a reference to the main window and only the first selected view. Because the views are in a linked list, the AppDelegate does not care about the other views at all. That is responsibility of the list. There is one little catch though. When the nib is being loaded, the current view will be referenced before the awakeFromNib is called. To get the view added as a subview I need to add it in the awakeFromNib. This will set the stage for the wizard.
AppDelegate.h
@interface AppDelegate : NSObject {
    __weak IBOutlet NSWindow *window;
    __weak IBOutlet MSZLinkedView *currentView;

    __weak CATransition *transition;
}

@property (retain) NSWindow *window;
@property (retain) MSZLinkedView *currentView;

- (IBAction)nextView:(id)sender;
- (IBAction)previousView:(id)sender;

@end
Method breakdown of the AppDelegate
- (void)awakeFromNib
{
    NSView *contentView = [[self window] contentView];
    [contentView setWantsLayer:YES];
    [contentView addSubview:[self currentView]];

    transition = [CATransition animation];
    [transition setType:kCATransitionPush];
    [transition setSubtype:kCATransitionFromLeft];

    NSDictionary *ani = [NSDictionary dictionaryWithObject:transition
                                                    forKey:@"subviews"];
    [contentView setAnimations:ani];
}
awakeFromNib
The awakeFromNib first turns on Core Animation for the content view of the window. It then adds the currently referenced “currentView” as a subview of the contentView. Since we have already set up the “currentView” to have a frameOrigin of 0,0 I do not need to worry about setting the subview’s location.
Next I build a CATransition animation. Note that I have kept a reference to this animation as an ivar in the AppDelegate. The reason for that will become apparent later. Once the animation is built, I add it as the transition animation for the key “subviews” in the content view. This transition animation will trigger whenever a subview is added, removed or replaced.
- (void)setCurrentView:(MSZLinkedView*)newView
{
    if (!currentView) {
        currentView = newView;
        return;
    }
    NSView *contentView = [[self window] contentView];
    [[contentView animator] replaceSubview:currentView with:newView];
    currentView = newView;
}
setCurrentView:(MSZLinkedView*)view
The reason that I overrode this setter method is a matter of convenience. Since I only ever wanted one view showing at any time, I can comfortably swap out the views whenever the setter for “currentView” is called. I could do this in other places to the same effect but since I want to keep track of the current view it is ideal to handle both at the same time. Therefore, whenever I want to switch the subviews I can pass the new view into the setCurrentView method and be done with it.
- (IBAction)nextView:(id)sender;
{
    if (![[self currentView] nextView]) return;
    [transition setSubtype:kCATransitionFromRight];
    [self setCurrentView:[[self currentView] nextView]];
}

- (IBAction)previousView:(id)sender;
{
    if (![[self currentView] previousView]) return;
    [transition setSubtype:kCATransitionFromLeft];
    [self setCurrentView:[[self currentView] previousView]];
}
nextView:(id)sender previousView:(id)sender
Both of these methods perform the same function. In each method I grab a reference to the current view and check that its previous/next is not nil. This is only protective since each view should have already disabled the buttons that don’t have a link.
Once that check is complete, I simply call setCurrentView: passing it the appropriate view — either the next or previous based on the method called. The setCurrentView: discussed above takes care of the rest. Just before I change the view, however, I change the subtype for the transition. This is the reason I keep a reference to the transition around. I do this so that visually the transitions make sense. The previous view comes in from the left and the next view comes in from the right. While this step is not necessary, it does give a nicer spacial feel to the animation.
Conclusion
So where is the magic? What makes the Core Animation transition happen? All of that is in the AppDelegate’s awakeFromNib. Simply setting the CATransition on the content view of the window takes care of all the animation. The rest of the code is just to handle all of the switching of the subview. You can play with the transitions very easily by change the type and subtype being set in the awakeFromNib of the AppDelegate.
[…] Cocoa Is My Girlfriend: “A question that I have seen pop up a few times is how to build a Wizard in Cocoa. Having thought about that question a bit I realized that a better answer to it is—how to build a wizard in Cocoa using Core Animation.” […]
[…] Marcus can really crank these articles out. His latest demonstrates how to create a Wizard interface with next and previous buttons, however, this is not your average every day Wizard interface. This one employs Core Animation. When you click the next or previous buttons, you’ll see that the next view slides in from the right or left depending on which you clicked. Take a look at his latest tutorial post: Core Animation Tutorial: Wizard Dialog with Transitions. […]
[…] http://www.cimgf.com/2008/03/03/core-animation-tutorial-wizard-dialog-with-transitions/The reason that I overrode this setter method is a matter of convenience. Since I only ever wanted one view showing at any time, I can comfortably swap out the views whenever the setter for “currentView†is called. … […]
[…] Cocoa Is My Girlfriend: “A question that I have seen pop up a few times is how to build a Wizard in Cocoa. Having thought about that question a bit I realized that a better answer to it is—how to build a wizard in Cocoa using Core Animation.” […]
[…] http://www.cimgf.com/2008/03/03/core-animation-tutorial-wizard-dialog-with-transitions/The reason that I overrode this setter method is a matter of convenience. Since I only ever wanted one view showing at any time, I can comfortably swap out the views whenever the setter for “currentView†is called. … […]
nice code!
Only problem: If you add a label to the MSZLinkedView you can easily see that the size of the view is somehow not correct. Adding an editable NSTextField makes matters even worse. Is there any cure for that?
W.
wasserturm,
I am not sure what you mean by “not correct”. I added labels (and the views already have buttons on them), and they display just fine. To what view are you adding elements?
[…] http://www.cimgf.com/2008/03/03/core-animation-tutorial-wizard-dialog-with-transitions/ […]
Hey,
I am wondering how I would extend this example to allow a choice/path. For example, right now it starts out with the First, which is wired to the Second. What is on the First view there was a Radio button, and depending on the users choice you would get either the Second or Third? How might that work?
-m
Yes you can control the flow in code. Just change the linked list to whatever you want.
Hmm, okay, I am looking through the code, but don’t know much about how linked lists work.
Also, is there a way to make this all work for Tiger (minus the cool animations?)
-m
Ah, okay I get it. I was able to add a radio button array to make the choice, and I added another MSZLinkedView called alternateView. This was hooked up in interface builder to the Third NSView, and then in the code, I just put in an if statement for the nextView action. Seems to work just fine.
Now I just need to figure out how to make this all work in Tiger and I will be on my way. Thanks for a great article, and a great site!
-m
Hello!
I understand what wasserturm means:
Adding some NSTextField or NStableView in place of the colored boxes ruins the animation. Some kind of ghost white rects stick into place while the actual contents of the view animates in or out. At the animation’s normal duration, it flickers, if you slow down the animation, you can easily see them. Can you confirm you’re having them too?
Like wasserturm I’d like to know if there’s something to do with that… Even 2 years after this post the problem remains.
I usually use a big view inserted in a smaller one which masks the unwanted parts and I animate the big view right or left with the animator as needed. It’s of course VERY painful, especially when you’ve got to calculate the various frame positions to pass to the [bigView.animator setFrame:…] method and when you happen to have to change something to the big view and have to unembed all subviews and start from scratch… :/
Thank you for any advice… (I hope you still follow those old posts :)
I also just noticed that text in text fields or labels looks very thin and a little aliased when displayed over a layer backed view.
And focus rings also look very skinny.
Same here – embedding controls in a view and animating that view as a subview distorts all controls in that view.
Almost as if the subview is slightly scaled up/down, i.e. a 500×500 view is displayed/scaled to a 496/496 or 502/502..
Any ideas..?