Core Animation Tutorial: Dashboard Effect
 In our continued efforts to demonstrate different ways to use Core Animation, we have noticed different effects you see in OS X itself that present an interesting challenge to duplicate. In a previous post, we demonstrated how to shake a login window similar to the way that OS X shakes the login window when the user enters the wrong password. This time, we’re going to demonstrate how to do what we’ve dubbed the Dashboard Effect.
I’m not sure this is the best name for it as some people may think we mean the ripple effect you see when you drop a new Dashboard widget on the screen, but what we mean is the way in which the Dashboard widgets that are already employed in Dashboard fly in and out of view when you enable and disable Dashboard. Enable Dashboard now and watch your widgets fly in from offscreen. Then disable it and watch the widgets fly out again. This is what we mean by the Dashboard effect and this is what we set out to duplicate.
Download the demo project from here: Dashboard Effect Sample Project. When you build and run it, press Command-N to add additional layers to the screen and then press Command-E to see the effect. Press Shift-Command-E to see the effect in slow motion.
Scaling Sublayers Is Automatic In Core Animation
When you create a Core Animation layer tree, your layer transformation cascades the tree automatically, so we really only have to create sublayers and add them to a top level layer upon which we perform the scaling transformation. Before we do that, though, go ahead and enable Dashboard in Mac OS X so you can see the effect that we’re going for. Hold the shift key while you enable/disable Dashboard and you’ll see it animate slowly. In my demo project I’ve simply created a BOOL variable to keep track of whether we are scaling up or down and set that on each invocation of the scaling function. Here is what the function looks like:
- (void)doItIn:(float)duration
{
    // Set the animation duration.
    [[NSAnimationContext currentContext] setDuration:duration];

    if( scaleUp )
    {
        // Scale everything (x, y, and z) by a factor of factor (static variable) and reduce the opacity
        CATransform3D transform = CATransform3DMakeScale(factor, factor, factor);
        [mainLayer setTransform:transform];
        mainLayer.opacity = 0.0f;
        scaleUp = NO;
    }
    else
    {
        // Scale the rect back down to the orignal and bring up the opacity
        CATransform3D transform = CATransform3DMakeScale(1.0f, 1.0f, 1.0f);
        [mainLayer setTransform:transform];
        mainLayer.opacity = 1.0f;
        scaleUp = YES;
    }
}
In this function we pass in the duration we want to use. This is predicated on whether or not the user was holding the shift key as we want to try to duplicate the effect of Dashboard as close as possible. Take a look at the two IBAction(s) we’ve declared in AppDelegate.h in the sample project to see it getting called.
Adding Random Layers
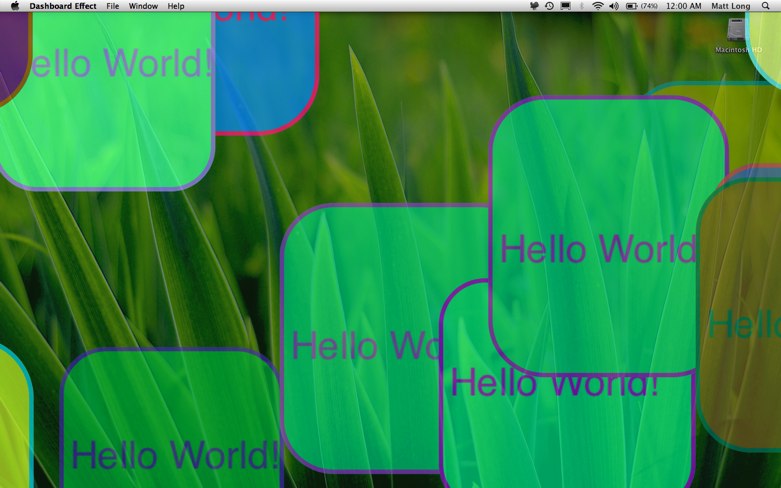
I’ve added another menu action as well as keyboard shortcut (Command-N) that will allow you to add new layers at random points with random sizes and colors onto the screen. Just press Command-N several times and then press Command-E again to see the effect. Notice that I’ve also dimmed the background behind the front layers (which are our representation of Dashboard widgets). That dimmed backing layer is actually the only layer we animate as you see in the previous code example. Here is how the layers (widgets) get created:
- (IBAction)addNewLayer:(id)sender;
{

    CALayer *layer = [CALayer layer];

    // Set some random colors, and the border width
    float r = SSRandomFloatBetween(1.00, 0.00);
    float g = SSRandomFloatBetween(1.00, 0.00);
    float b = SSRandomFloatBetween(1.00, 0.00);

    layer.backgroundColor = CGColorCreateGenericRGB(r,g,b,1.0f);
    layer.borderColor=CGColorCreateGenericRGB(b,r,g,1.0f);
    layer.borderWidth=4.0;

    // Create a random rectangle with a size between 300 and 200 pixels.
    NSRect rect = NSZeroRect;
    rect.size = NSMakeSize( SSRandomFloatBetween( 300.0, 200.0 ), SSRandomFloatBetween( 300.0, 200.0 ));

    // Calculate random origin point
    rect.origin = SSRandomPointForSizeWithinRect( rect.size, [window frame] );

    // Set the layer frame to our random rectangle.
    layer.frame = NSRectToCGRect(rect);
    layer.cornerRadius = rect.size.height/5;

    // Create a text layer to add so we can see text scale too.
    CATextLayer *textLayer = [CATextLayer layer];
    textLayer.string = @"Hello World!";
    CGFontRef font = CGFontCreateWithFontName((CFStringRef)@"Helvetica");
    textLayer.font = font;
    textLayer.frame = CGRectMake(10.0, 100.0, 195.0, 35.0);
    CGFontRelease(font);

    // Use the same color for the text that we used for the border.
    textLayer.foregroundColor = layer.borderColor;
    // Add the text layer
    [layer addSublayer:textLayer];

    // Insert the layer into the root layer
    [mainLayer addSublayer:layer];
}
Note: I grabbed these convenience functions, SSRandomFloatBetween and SSRandomPointForSizeWithinRectfrom the <ScreenSaver/ScreenSaver.h> library. They provide a simple way to get random points and rectangles for placing new layers on the screen. You’ll need to #import <ScreenSaver/ScreenSaver.h> to use them in your projects.
Trans-Parent
The parent window in our application, is a borderless window with a transparent background color. You’ll see the window class we’ve created called BorderlessWindow in the project. This simply removes the borders and makes the backing window transparent so all we see are Core Animation layers. I used a similar technique in my last post. Again, I haven’t taken the time to see if there is a way to click through the window. As it stands, you can see through the window, but when you try to click what’s behind it, no dice.
Conclusion
Well, that’s about it for this one. It’s pretty simple thanks to Core Animation. Marcus and I started down a path where we were trying to figure out all of the math ourselves in order to scale and move each of the CALayer frames individually. As it turns out, all of the hard work is done for us where all we had to do was specify the scaleX, scaleY, and scaleZ to the CATransform3DMakeScale function and voila, instant layer scaling with cascading. I’m continually impressed by all Apple has provided to developers to use in Core Animation. It’s a great library.
Hello Matt,
Looks like you need the latest version of xCode to run your project. I’m running xCode 3.0 on Leopard and I got a warning message when I opened the project. The program also refused to run. You must have downloaded the new version of xCode when the iPhone SDK came out last week.
I’m surprised backwards compatibility was lost.
M@
Matthieu,
I’m sorry about that. It didn’t even occur to me that it wouldn’t work with XCode 3.0. What’s up with that, Apple? You’re right, I did upgrade. I’ll see if I can get a compatible project put together ASAP.
Thanks.
-Matt
Matt,
I’ve created a project that works pre iPhone SDK install.
http://allusions.sourceforge.net/Blog/DashboardEffectxcode3.zip
Hey thanks for doing that Matthieu. I appreciate it.
Turns out that there is a compatibility setting in the project prefs. I just changed that to XCode 3.0 compatible. Download the sample project again and see if it will open and build now (if you’re so inclined ;-) )
Thanks again.
-Matt
Hey Matt,
Yeah the new one works fine. It’s good to know about that project preference, now I’m not so worried about installing that iPhone SDK. ;)
M@
[…] I just finished another Core Animation tutorial and posted it at CIMGF over the weekend. This was a pretty fun one. I wanted to duplicate the effect of the Dashboard widgets flying in and out from off screen and this is what I came up with. Take a look and let me know what you think. Core Animation Tutorial: Dashbaord Effect. […]
Hi,
Your question on how to click through the window. Just add
[self setIgnoresMouseEvents:YES];
to your borderlesswindow class.
[…] Core Animation Tutorial: Dashboard Effect […]